31 August 2014

Powder Room Lighting with DecorPlanet

Although it's not at the top of our priority list, we do have plans to eventually update our powder room. It's a room most guests see when they visit our house and it's also the only room left on our first floor that hasn't been repainted (mudroom excluded). Jordan and I have discussed a few times how we would love to replace the traditional style sink/vanity with a more modern one. Unfortunately, we don't have it in our budget right now to give the powder room a complete makeover, but what we can do is start to work on it piece by piece. 

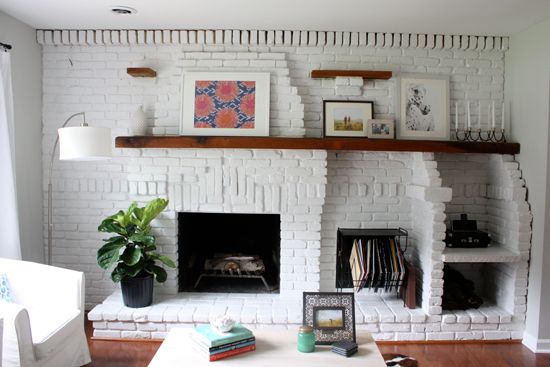
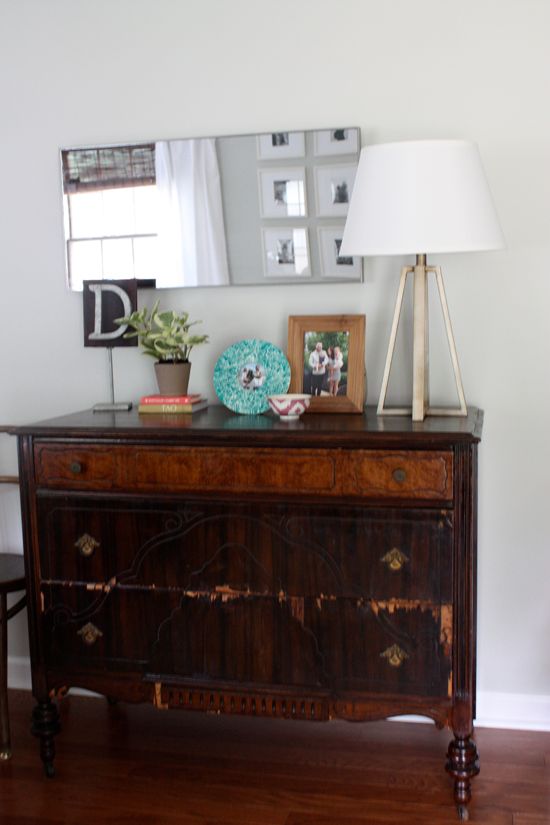
One of the first things I would like to tackle in the powder room is replacing the current light fixture. You can catch a peek of it in the below photo I used when I posted about our new mirror.


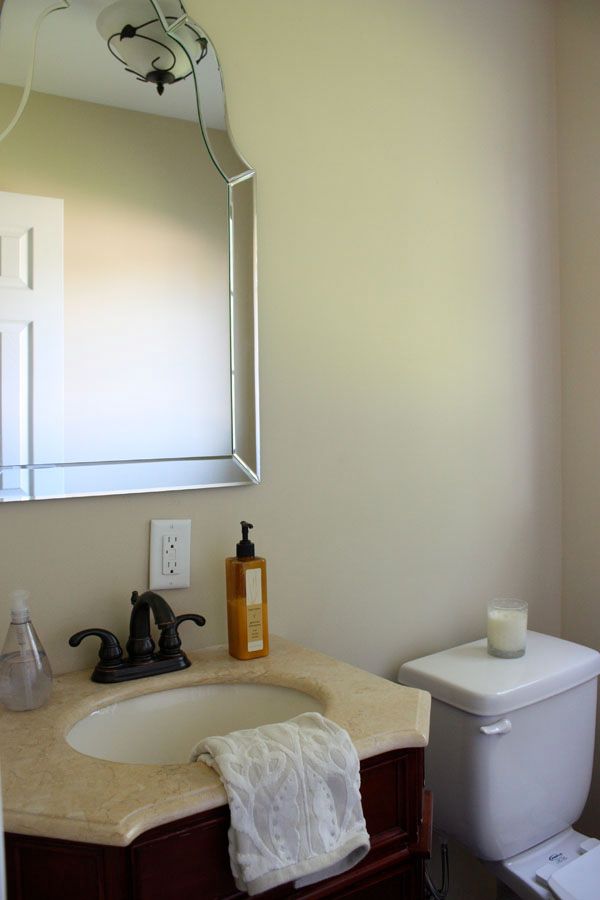
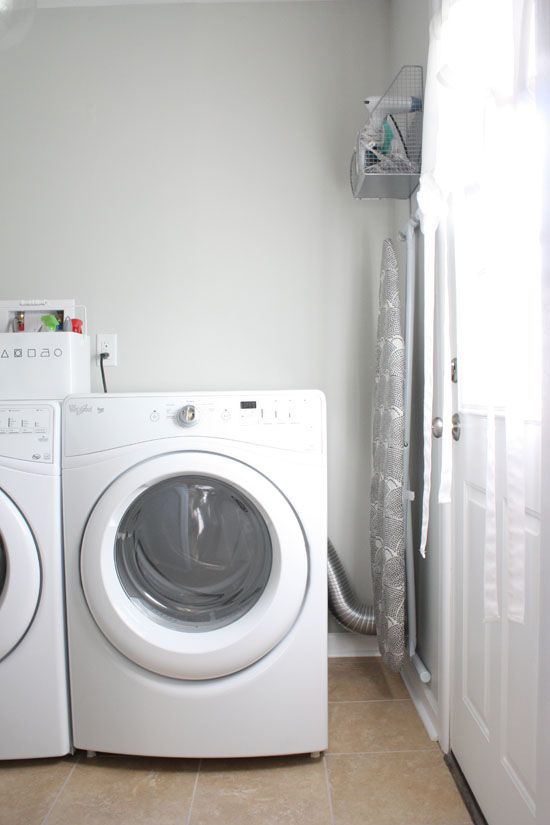
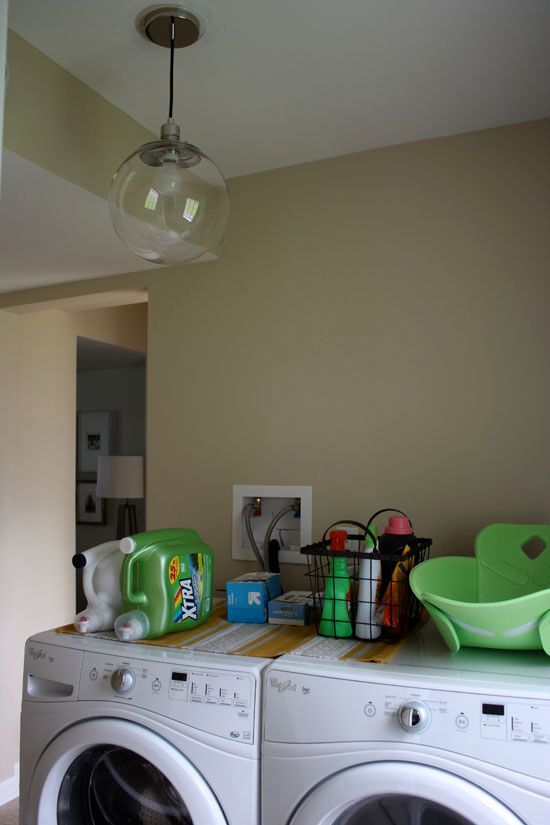
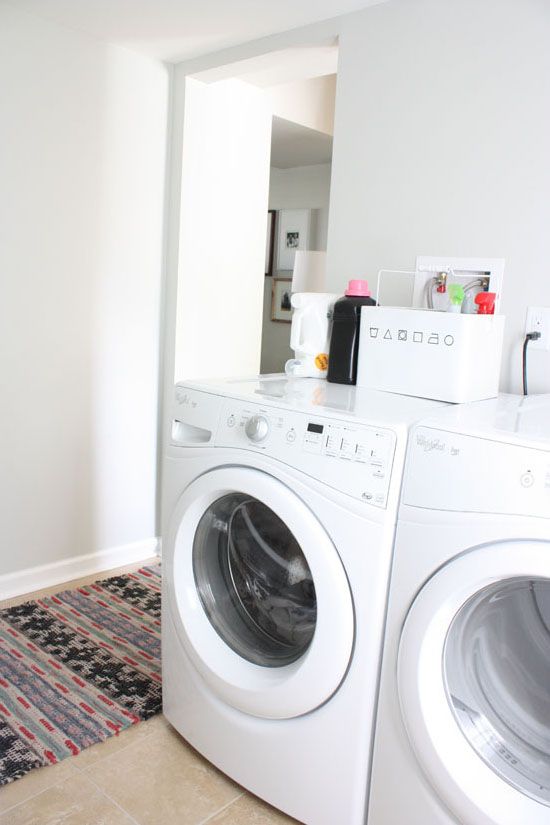
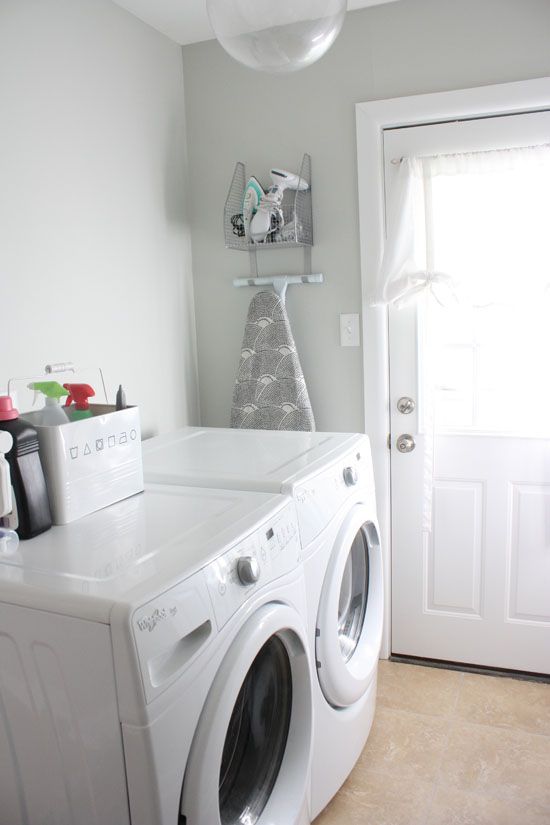
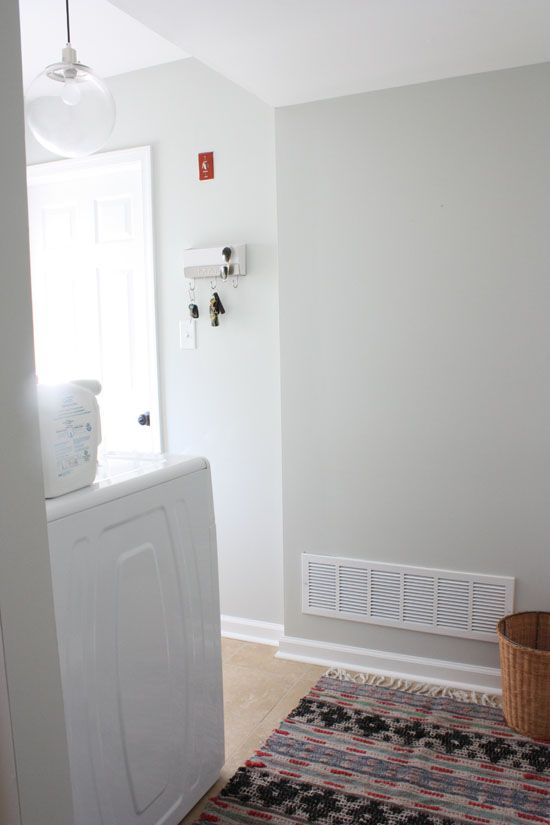
The fixture itself is practically brand new. It's in great shape and a very nice fixture; it's just not our taste. Back when we replaced the lights on our first floor, Jordan suggested adding the powder room to the list of rooms. I brushed it off as I wasn't sure what we were going to do with the room and didn't want to make any decisions yet. I will say that once we started replacing the lights in our kitchen, laundry and hallway (you can read more about that here), the house started to feel more modern and more 'us'. I've said this before, but I'm a true believe that if you aren't in the place for a complete renovation, a few tweaks in paint or accent pieces can make a world of difference to a room. 


I recently started scouring DecorPlanet for some ideas of what type of light fixture we'd want in our powder room. Whether you're planning an entire bathroom renovation or just want to update a few accents like lighting and fixtures, DecorPlanet is a one stop shop for all things bathroom.

DecorPlanet has a great selection of lights and it was hard to narrow them down to just one. There are great options and we'd have to decide which route we want to take - keeping with the flush mount, adding some dimension with a pendant, or really change things up and install sconces.  

I chose a few of my favorites from their website to share.


1 | 2 | 3 | 4 | 5 | 6 | 7 | 8 | 9 

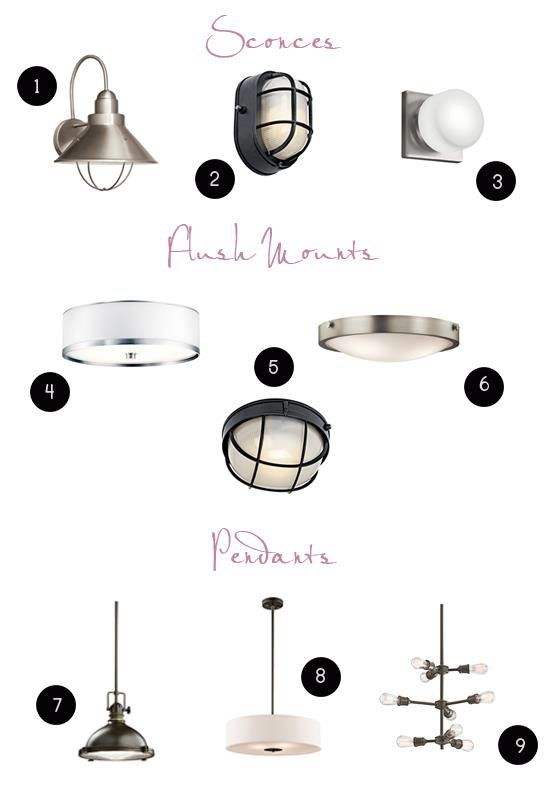
Of the sconces, #1 is my top choice. Given the mirror I hung a few months back, we might not have the space to install sconces. If we stick with a flush mount, I think #4 would be a great option. It's modern, but also has a more elegant look to complement the style of the frameless mirror. My favorite of the pendants has to be #9. I love the industrial look and it would go well with the more rustic style sinks with exposed metal legs that I've been drooling over on Pinterest. All the lights are so different from each other that we would need to decide what style we ultimately want for the powder room.

Is there a room you know you need to tackle, but just don't have it in our budget/time to take on? How are you making it feel like your space in the meantime.

This post is kindly brought to you by DecorPlanet.com. All opinions and words are my own.

29 August 2014

Bittersweet


Today marks my last day of work at the wine and spirit distributor where I've spent the last 6 and a half years. Since Mila was born and since we've moved, life has been quite a whirlwind. In addition, Jordan has been presented some pretty great opportunities with his company which will alter his schedule over the next few months. On top of all that, Lucy starts school next week. All things combined, we decided it would be best for me to step down and work PT. Since that is not an option at my current employer, I am ending work now in time for preschool to begin and I'm on the hunt for a part time gig. 

While I'm sad to leave my job and all the friends I've made, I'm really looking forward to getting quality time with the girls. Being able to drop Lucy off at school and pick her up is so important to me. Also being there to witness Mila's milestones will be amazing (I missed a handful of them when Lucy was little due to being at work). My mornings won't be so rushed and I won't be running out the door before the girls are even awake. My evenings won't just consist of rushing home from work to a flurry of nursing, dinner, bath time, books and bed. Lucy is so excited and we've been having a mini countdown this week with how many days until mommy is home with her. As I said, I have nothing part time lined up yet, but I'm excited for the opportunities that may come. You may have seen on my Instagram account that I recently applied for a position with Design*Sponge. While I didn't get the position, I did make it to the second round and in the top 10 candidates. That alone is pretty darn exciting for me. 

So what does this mean for the blog? Being home more will also allow me to focus a lot on our house and continue to keep the projects coming (on a much tighter, challenging budget might I add). I'm looking forward to being able to posting better quality, more innovative posts and projects. I have big plans to freshen up the layout and look of the blog, I've even considered shortening or changing up the name a bit. (Nothing definite!)

Thank you to all of you who read this blog on a daily or weekly basis. Look forward to bigger and better things to come! Happy Friday :)

27 August 2014

Styling with Acrylic Photo Blocks


In our previous house I was never one to have a ton of personal photos on display. Not for any particular reason, it just wasn't my taste preference for that space. Since we moved (and since we added a little Mila-bean to our family), I have wanted to have more and more family photos to personalize our home. It's funny how your style and taste changes when you have a fresh blank slate to start decorating. I recently ordered this acrylic photo block from Tiny Prints and have had a blast trying it out in different places in our home. 


The photo I chose for the acrylic block was one from our family photo session we had just over a year ago. While I wanted to use a photo that included our whole family, we only have maybe three photos of the four of us, all of which I already have framed and on display in our house. I still cherish the photos we took with just Lucy that day and like to have a few of them on display as a great memory.


I currently have the photo block on display on our mantle with a few other favorite photos of mine. What I love most about the photo block is that it is so versatile. The block itself is about an inch thick so you don't need to prop it against anything to stand. It's a clean addition to the mix of frames photos already on our mantle. I'm a fan of mixing different sizes, colors and finishes with my frames and this added an additional element with the clear acrylic and compliments the existing frames. 

If you prefer, there are a ton of additional options to add to your block including your family name, a quote and even some colorful decorative accents. I chose to stick with a simple photo only. They also come in 5"x7" and 7"x7" options. Even though it's the smallest photo I think the photo block stands out even more than the two large frames. With the thickness of the acrylic and the lack of frame the photo truly becomes the main focal point without a matte or frame  as a distraction . 


Of course before finding it's home on our mantle I tried a number of different places to put this photo block. 

We get some good light from the french doors in our kitchen so I propped it up on our counter along with a houseplant. It's bold enough that the block could actually stand on its own in a space without needing something to compliment it.


Coffee table styling is always fun. Your guests' eyes will always goes to what is sitting on your coffee table as it becomes the main focal point in a sitting area. I liked the look of the photo block on top of a stack of books and paired with a smaller decorate accent like this little closed container from Anthropologie.  


Because of the thick clear glass, the photo block looked gorgeous on our bright kitchen window sill paired with a few freshly picked flowers in my 'mommy vase' - a birthday gift I received from my mother-in-law specifically for flowers picked by little hands. It's a little hard to tell from this photo but with the natural light coming in through the window, the photo was brighter and bolder than it looked in any other place. 


I also like the idea of using the block as an office desk accent. I tend to have a lot cluttering up my desk and it was nice to use this as a catchall paperweight. Once of my favorite things to do when decorating is use something in a way it might not necessarily have been intended.  I had it holding down some of my very important Gap and Old Navy coupons/reward dollars. Don't want to ever lose those, they are like gold for a mom when it comes to shopping for kid's clothes. 


For now the block will remain on our mantle, but I'm excited at the thought of moving it around the house and using it in different places since it really is so versatile. Eventually once we get new professional photos taken of our family I'll definitely be ordering another one that includes Mila. This one may in turn end up in Lucy's room as I like the idea of her having some memories from when we were a family of three.


When you think of Tiny Prints, do you just think of invitations,cards, etc? Did you know they are expanding with a selection of home decor items, including the most adorable custom pillows? Check out the variety of options for these fun photo blocks as well as the other products Tiny Prints has to offer!

26 August 2014

The Power of Paint - Laundry Room Progress


I had no intentions of tackling any paint projects in the next few weeks, and certainly had no plans to paint a room this past weekend. After my original plans to take a ton of blog photos on Saturday were foiled by a rainy, overcast day (aka not suitable for indoor photos), I started to look at my laundry room and get the itch. The itch to paint. 

I'm one of those strange birds who loves painting a room. (I also have bad design ADD and can't tackle just one room at a time, in case you haven't noticed.) I truly enjoy getting down and dirty with a paint brush. For me, it's the satisfaction of watching a room transform right before your eyes. In my opinion, paint is the base of what makes a room. It completely changes the way you see a room. Remember the before photo of Mila's nursery? You can use any rugs, furniture, pillows, wall art, but a smart paint choice sets the tone of your space. Paint determines not just how the room looks, but how it feels, and that is so important to me. I need our home to feel warm and comfortable. I love a good white wall and have seen so many inspirational homes that use them, but for me in our home it just doesn't feel finished (with the exception of planked walls since that adds dimension). I need the warmth of a painted wall, even if it's a color as light as the one we use in our house (Benjamin Moore 'Moonshine'). If you need a quick change but don't have it in your budget to do a complete room renovation, a gallon of paint will do the trick. Just the contrast of a good color against bright white trim gets my blood pumping. 

Since Jordan was home on Saturday and could entertain the babes, I snuck out to pick up some paint. I arrived about 20 minutes before the shop closed, but the man behind the counter seemed relieved when I knew exactly what I wanted and was a quick, easy customer.

Here's the only 'before' photo I have and this was back in May when we swapped the light fixture in the laundry room. Like the rest of the house the walls were painted a neutral beige.


Even though the space is very small, it still took me a few hours to paint the room as I had to take breaks for dinner, nursing Mila, watching part of a movie with Lucy and bedtime routine. It took next to no time before we had things back together and looking normal again, only better. Instantly the room looked fresher, brighter, even bigger.


While this room hasn't been a huge priority, I've slowly been adding things here and there, piece by piece. I snagged a new ironing board cover from Target over the weekend thanks to some gift cards I received for my birthday. 


This adorable little laundry caddy was a Homegoods find and replaced the wire basket we were using before. 


This little mail/key station was another Target find. We decided to put it in the laundry room since we generally enter the house through the mudroom. Also it's a good place to stash things we want to remember on our way out the door (iPod, coupons, sunglasses, etc).


I recycled this rug from our townhouse. If I remember correctly it was a Pottery Barn find. I love the bold colors against the new gray walls. 


We still desperately need some sort of storage solution in the laundry room, specifically above the washer and dryer, to stash laundry accessories - dryer sheets, stain removers, etc. We've tossed around the idea of building a stained wood counter similar to this one above the appliances. The only issue is that I don't want it to turn into a new place to toss all the junk that sits on them already. I'd prefer some sort of closed storage, but cabinets might look too awkward since the wall is open to one side. Maybe finding a few more caddys like the one from Homegoods or some baskets to stack in a row on the counter.  


Next up for this room is adding some art on the walls. I already ordered a prints off Etsy last week that I hope to hang on the far wall that faces the hallway.


I love the Beverly prints from The Aestate and finally bit the bullet and purchased two of them. I'd like to possibly hang all 4, two on each adjacent wall, but decided to start with two and see how I like them.  I like the idea of seeing them down the hall from the kitchen. 


So while the laundry room isn't a room we're ready to finish right away, just giving it a fresh coat of paint helps keep the flow of our first floor going. It's a quick and easy upgrade that satisfies my need for a little change and makes this a place I might not mind spending a little time doing laundry inside. 

25 August 2014

Mila Jane: 4 Month Milestones


Seriously, this face kills me. I can't stand it. 

This post crept up on me. I could have sworn I just posted about her three month milestones last week. Things around here have been going a mile a minute and I'm trying to slow down and really enjoy each moment. Friday marked 4 months for our Mila Jane and I have to say I've seen the biggest changes in her these past few weeks.

The stats:
Weight: 12 pounds, 8.5 ounces
Length: 25 inches long
  • She still sleeps great and goes to bed anywhere between 8-9:00. She isn't as scheduled these past two weeks as she has been (was sleeping 9-5 solid). She wakes usually between 3-4:00AM, but goes right back to sleep after eating. Generally wakes for the day around 7-7:30AM.
  • Has been sitting up pretty solid with assistance. We found this great chair for her (it's actually a toddler's saucer chair from Target) and she will sit in it for long periods of time. She's even sitting in the chair for all the photos in this post. It has become a lifesaver as she often grew frustrated of lying down and not being able to see things, and was usually only happy being held. 
  • We are hoping to introduce her to her activity chair soon. Uses the bumbo for short periods of time.
  • She has discovered her feet and loves to chew on those toes. :)
  • Just the past few days I caught her taking her fallen pacifier and putting it back in her mouth.
  • Jordan told me she holds her bottle when eating. I haven't seen since I'm always nursing when she's with me. 
  • She's rolling all over the place, most often from back to belly. Unfortunately she tends to do this a handful of times when she's going down for a nap or bedtime so we have to come into the room a few times and flip her.
  • Aside from the recent rolling over, she puts herself to sleep every night with the help of a snuggly swaddle and a pacifier. 
  • Smiles ALL THE TIME. We've been able to get some good laughs, too. Lucy seems to be able to get smiles and laughs out of her more than anyone. Likes to see and smile at her own reflection. Little stinker smiles so much at bedtime that it's hard to put her down. 


These eyes haven't decided if they are turning brown or staying dark blue. And those lashes...


I thought it would be fun to compare photos of Mila and Lucy at 4 months. 

(I finally learned how to adjust lighting in my photos. What a difference 3 years makes!)

I definitely see some similarities, but I didn't realize how different they really look until I put them side to side. Their smiles are almost identical, but Lucy's eyes are shaped more like Jordan's while Mila's are bigger. It's hard to see in these photos, but Mila has darker hair. Also Lucy's eyes had already changed to brown at this point and Mila's haven't made up their mind what color they will ultimately be. Lucy's nose still looks like that when she smiles. Seeing this comparison gets me excited to see how Mila will look as she grows and if she looks more or less like Lucy.  

21 August 2014

Inspiration: Curtain Room Dividers

As I mentioned in Tuesday's post, we are planning to hang a curtain space divider in front of our oil tank to hide one of the many eyesores we have in our utility room. We decided the best idea would be to install some sort of track system on the ceiling to hang a floor to ceiling curtain that will easily open and close. Not only can we hide our oil tank, but we want to install a storage system for all of our cleaning supplies on the wall beside it.

The next task is deciding what type of curtains to use for this space - white or colored, solid or patterned, thick or sheer?


Any of you SATC fans remember Carrie had one between her bedroom and living room? I only remember one episode of her actually using it, but I loved that idea as soon as I saw it. 


While it seems the most plain, I think the last option would be the smartest for us in that space. Sheer wouldn't work as the point of the curtain is that we don't want anything behind it to show. I love the idea and look of a patterned curtain, but since the plan is to maximize look of the space in the room and to distract the attention from that corner, it might be too busy.

Have you installed a curtain to divide up a room? Any tips?

19 August 2014

Mudroom - The Before Photos

As promised, I snapped a few 'before' photos of our utility room/soon to be mudroom. Last week I shared with you my plans for this space.

Be warned: these photos aren't pretty. Our current utility room is cluttered, messy, dark and scary. It doesn't help that the lighting isn't the best for photos. I had to prop open the garage door to get a little more light to get them this bright. The room itself isn't bad during the day and we have two light sources when it gets dark at night. 

 
This is the view from the door entering from the garage. There is a double window (Maybe 50" wide? I could be wrong, but I'm basing it off the size of the 40" bench I purchased) that looks out into the backyard. We already had the Ikea Aneboda Wardrobe in place when I took these photos and have since added the bench from Target under the windows. We have a bulky high chair holding all the leftover decorations from Lucy's birthday party, as well as Jordan's tool box and a storage bin with more tools under the window. To the right are a few kitchen appliances that we don't use regularly. Next to the window is our Verizon box where our internet/cable is hooked up (eyesore #1).

 
Turning to the left you can see the door that leads into our laundry room. You can also see our hot water heater and furnace against that wall (eyesores #2 and #3). Along the garage wall we have our dingy utility sink (eyesore #4) as well as all our cleaning supplies stored underneath. I know it looks like a dangerous situation for a house with young kiddos, but Lucy has never been one to get into things she isn't supposed to (Honestly we've never even baby proofed past outlets and a gate at the steps). By the time Mila is up and crawling around this room will be in shape and the cleaning supplies will be stored off the floor.  

 
When you face the other way you can see our oil tank against the far wall (eyesore #5). The door on the right leads to our garage. You can see on both the far wall and garage wall that there are brackets for shelves already installed. This would be nice, except when Jordan tried to hang shelves they fell right down. We plan to remove these as we want to repaint the room anyway.

 
It's a little difficult to see, but the far corner contains our paint supplies as well as a stash of wall art and rugs that we haven't decided what to do with, yet. The vaccuum, shop vac and rug shampooer are just hanging out in front of the oil tank.
 
After chatting a bit we decided that we'd like to somehow install a track unit along the ceiling about a foot or so in front of the oil tank that we can hang a wall-to-wall curtain to create a 'wall' that closes off the tank from the rest of the room. We would also use the empty space (well empty once we remove all the clutter) to the left of the tank to install real shelves and store all our cleaning supplies and hide our vaccuums behind that curtain.

 
Here are the two light sources I mentioned above. I'm not really sure the reason for the placement of the track light aside from the fact that the stagers had a card table under the window. I'd like to find a more modern, smaller track light to replace this one that still gives significant light. The flush mount will be replaced with the Crate and Barrel pendant I shared in last week's post. I also have plans for some window treatments thanks to a great deal I scored on a clearance curtain from Pottery Barn. My idea will put my sewing skills to the test. I also ordered the Chevron Knot Rug from West Elm earlier this week since it's currently on sale!
 
There you have it. Our ugly little utility room. These photos really make me want to get moving.
 
Do you have any 'ugly' rooms you're itching to makeover?

15 August 2014

30


Taking the day off to wear a crown and drink coffee in bed all day. 
Have a great weekend!

14 August 2014

School Shopping with Tea Collection


Today's post is a fun, non-home decor post. With three weeks to go until school starts, I've had serious school shopping on the brain. I was definitely one of those kids who would get excited for back to school shopping. I loved picking out my favorite patterned folders, notebooks, bookbag, pencils, etc. One thing I didn't get to enjoy was back to school clothes shopping. I went to private school K-12 grades and wore a uniform every day. Once I started college it was a whole new experience to actually plan out what to wear each day.

Lucy is starting preschool this year (cue my tears) and will be going three days a week. In all honesty I'm really excited for her to begin school and all the fun experiences that go with it. Plus I'll take any excuse to do a little shopping and Lucy could certainly use some fall clothes.

I recently teamed up with Tea Collection as a new affiliate for A Simple Kind of Life. I was first introdued to Tea Collection when Lucy was born and I received a few items from their infant line as a gift. I fell in love with their unique patterns, great fit and mature look. I really love when kids' clothes mirror something I would wear myself. My favorite thing about Tea Collection is how great all of the pieces can be mixed and matched. Purchase a few staple items and you'll be set for the season!

After drooling over their fall collection I put together a few outfits that I could defiitely see Lucy rocking to school.

 
The first option is my personal favorite as I have a pair of pants almost identical to those and I'm not ashamed to dress Lucy and mommy alike. I think the top right would be Lucy's favorite as my girl loves red.
 
Are you itching to do some shopping now? Click below to get started.
BONUS: They're having an extra 25% off sale items today only with code 'BYEBYE'.


*Note: The above blog post contains affliliate links and is sponsored by Tea Collection. All opinons and words are my own.*
 

13 August 2014

Mud Room Planning

So we have a utility room. It's the room you enter when you come in the house through the garage, and it is connected through our laundry room to the rest of the house. We don't have a basement so this room houses our hot water heater, furnace and oil tank. It also has a utility sink and is currently the home for our tools, paint supplies, cleaning supplies, and stores items we haven't put in the attic yet. You're probably picturing quite a glamorous set-up aren't you? It's become quite the junk room and I'm hoping to clean things up a bit and make the room more functional. I promise to have photos later as I haven't had a chance to really get them together.

Designing this room is a bit of a challenge due to the fact that we have a number of huge eyesores. The furnace/heater/tank situation is one we can't avoid. Without adding walls and seriously cutting into precious limited space, they are there to stay and we just have to work around them. We also have our internet hookup attached to a wall in there as well as some mounts for shelving that are painted on (aka practically glued to) the wall in certain spots. The utility sink is rather ugly and stained with paint/stain/whatever else has been washed in there. I'd love to someday replace it with a prettier one.

While this room will never be perfect due to the fact that it needs to be practical, I can still dress it up a bit. Here's what I'm thinking to transform this utility room into a mud room:


1 | 2 | 3 | 4 | 5 | 6 | 7 | 8 | 9

We've already purchased the Ikea Aneboda Wardrobe and set it up in the room. It currently holds my craft supplies, but we are considering purchasing a second to use as a coat closet. Our current coat closet in the living room is being used as a toy closet since we more often than not enter the house through the garage and utility room. We also have the Target bench already next to the wardrobe to use as a seat when putting on boots or taking off jackets. We have a double window in the room and the bench fits nicely underneath next to the wardrobe. 

We currently have awful track lighting on the ceiling towards one wall as well as a flush mount in the middle of the room. I'd like to replace the track lighting with a cleaner, less noticeable version and install a pretty pendant in place of the flush mount. 

The striped baskets are the same ones we have in our living room to hold Lucy's toys. I picture a few of them tucked under the bench holding scarves, gloves and hats, maybe labeled separate for each family member. The L and M hooks will be used to hold book bags or jackets when our little ones come home from school or a trip out.

I currently have a kilim rug on the floor but because of the nature of the room I think a natural fiber rug would make more sense for wet boots and drippy umbrellas. The pillows and art are just fun accents to make this utility room feel cozier and more welcoming. 

Just seeing this mood board is getting me excited to get this room into shape!

11 August 2014

Case of the Mondays

 
Yesterday had it's moments. Sundays are usually spent with my side of the family while Jordan works. Lucy was being a tough three year old and Mila was being a doll, but needed to be nursed a lot. Mila went to bed fairly easy after a bath and a feeding. Lately Lucy will only go to bed with me so I end up doing bedtime routine x2 most of the time. Jordan and I didn't sit down for dinner until about 10:30pm - followed by a shot of tequila for each. (It was necessary.) I did get to sneak in an iced chai latte yesterday after at trip to Target with the girls. One of my favorite treats these days and probably the only reason I was still awake at 10:30 for dinner.
 
Some days can be really challenging trying to keep things going with two young kids, but I wouldn't trade it for the world.
 
Taking this Monday to regroup and back to the blog tomorrow.

08 August 2014

Living Room Additions and Plans

 
We've made some changes and have had a bit more progress in the living room since the last time I showed you. I still consider this room very much a work in progress as I have tons of ideas still to come, but I'm pretty pleased with how things are falling into place.
 
First things first, I needed to freshen up the mantle. I just wasn't happy with the brown mirror we had up there. To me it made the space feel too dark, so I took one of the framed napkins that used to hang above the couch in our townhouse and propped it up on the mantle for a light, brighter pop of color. These framed napkins are still one of my favorite, and easiest DIY projects. You can see I have only one of them up there. Did you catch the second one in this sneak peek? Is it bad decor manners to have the same piece of art in two places in your home? I don't think so, especially when one of the places is rarely seen by guests.
 
I also needed some greens in the living room and picked up a great leafy friend from Home Depot. He still needs a proper planter, but I'm waiting to make sure I can keep him alive before spending some serious dough on one.
 
 
Speaking of, does anyone know what kind of plant that is? It didn't come with a tag and I'm struggling a bit to keep it alive. I've already lost a few large leaves.
 
 
We purchased two ikea Ektorp Tullsta chairs to add some seating to the room. Definitely fills out the space better and makes it feel a bit cozier. The 'pillows' on the chairs are actually old Anthropologie napkins wrapped around the pillows that came with the chair. I was using them as sort of a test run to see if I liked pattern pillows on the chairs before purchasing any.
 
 
I went back and forth between a number of pillow covers I saw on Etsy. I narrowed it down to two options, photoshopped into the living room below. Ignore the color quality of the below photoshopped options, they are both from a photo I took on my phone and make the space look darker and the fireplace look beige, not white.
 
Option 1. I love this pillow cover from Loubella1 and probably would have purchased it if I hadn't done a photoshop test run first. While I like the blue it seems too dark with the amount of dark brown in the blinds, couch and rug.
 
 
Option 2 was the winner for me. The pillows below from chicdecorpillows have hints of blue to tie in with the framed napkin on the mantle, yet are still light enough on the chairs not to make that space feel too dark and heavy with the rest of the room. Once I actually have the pillows I'll take fresh photos to show. In the meantime you can enjoy my choppy photoshopped  version.
 
 
I also purchased this pillow cover from The Mod Boho, my new favorite online textile shop. I'm so in love with it that I'm saving up to purchase more! The pillow cover just arrived yesterday so I didn't have it on time for these photos, but picture that thrown into the mix. Possibly on the couch with a few more boho pieces. I'm loving the latest Indigo home decor trend and need to add some into the house asap.
 
 
Another addition to the room is a brown leather morroccan pouf on the other side of the coffee table. We toyed with the idea of having each of the chairs on either side of the coffee table, but didn't like the idea of having someone's back face the kitchen when we entertain. Seems somewhat counter productive to the open floor plan of the living room/kitchen space. We opted for a lower alternative with the pouf to balance out the other side of the coffee table opposite the chairs, and also provide an optional seat or foot rest without closing the seating space off to the kitchen.
 
Below you can see how the kitchen opens up into the living room. (Also a peek at the new chalkboard wall!)
 
 
I filled out the frames on the gallery wall by the front door using all black and white family photos. I love the idea of being able to change them out every few months with fresh ones, especially when the kids keep growing so quickly. This wall has proven to be a a great piece for guests to look at when they visit.
 
The striped baskets on Lucy's toy box are a temporary placement.  I purchased them from the Container Store to store Lucy's toys that don't fit in her toy box (ahh the perks of having a birthday party - more toys!). They are a bit big and cluttery to keep on top of the toy box and I have plans to move them elsewhere.
 
 
I rearranged the antique dresser a bit and added some family photos (we finally have a few of all 4 of us!) as well as a plant to bring a little green to that side of the room.
 
 
While I adore this dresser it just doesn't fit in our living room the way I had originally hoped it would. It's a bit bulky and seems somewhat out of place as the first thing people see when they walk in our front door.
 
 
I'm currently on the hunt for a new console table to take it's place, preferably one with a bottom shelf to house the striped baskets with Lucy's toys that I mentioned above. I have a few I'm considering, but I think this post has rambled on long enough, I'll save those for another post next week.
 
Happy Friday!