As promised, I'm going to give you the 411 of how I turned old art from this:
into this:
I found these old art pieces on my grandparents' basement probably two years ago.

I loved the shape of the frames and thought the prints were neat so I asked my Pop if I could take them since they were just hanging in the back of the basement with the rest of his 'junk.' He said yes so I took them home with no real plan for them, and for the past two years or so they have been sitting in my basement.
Well I finally got to putting these to good use. Like I mentioned yesterday I was originally planning to frame some of the cards Jordan has given me over the years. Even though I would hang them in the master bathroom where really only Jordan and I would see, the cards still seemed to personal to put on display. I moved onto Plan B which was enlarging and framing the photo booth pictures from the wedding we attended last weekend.
This past weekend I got to work.
First things first, the frames desperately needed a good cleaning.
I just took a wet rag and wiped the frames down with water, collecting half a pound of dust. Gross.
Next I needed to take apart the frames. As you can see, the backs of them were a little rough. Several of the staples were bent or crooked. Some staples were actually under the pictures somehow. There was really no nice way to bend them back to be reused so they were all pulled out.
The pictures popped out easily once the staples were removed, which is when I realized there was no back to the frames. My original plan was to mount the photos on the back piece of the frame and pop the frame back together. One I saw how poorly the pictures were framed and the fact that there was no back to the frames, I changed my plan to the 'floating' frames.
Not quite sure what I'm going to do with the art. Toss them? Donate them?
Now my frames were ready to paint.
The wood was already pretty rough with no finish so sanding wasn't necessary.
I liked the thin black border on the inside of the frame. I decided to tape it off and keep it black rather than painting it with the rest of the frame.

Here is where I once again praise Frog Tape. Seriously, I love this stuff.
I made the switch from the ol' blue tape to this great green roll when I was painting stripes in Lucy's room and haven't looked back since.
The paint I picked was Martha Stewart's craft paint in "Gray Wolf." I had never used this paint before but I saw it in Michael's and wanted to give it a try. I really liked the color and it came in a high gloss which was perfect to paint a frame.
I got to work painting. It took me three coats with an hour drying between each. After the third coat I let the frames dry overnight to ensure that the color was set.
Then I simply peeled off the painter's tape to reveal the black border on the side of the frames.
TIP: I actually learned this from watching my mom paint when I was younger. To avoid constantly washing brushes between coats, stick your wet brush in a zip lock back and toss it in the freezer. When you are ready to paint your next coat, just take it out and give it a few minutes to defrost and you are good to go. This works for both sponge brushed and regular paint brushed.
Once the frames were finished I was ready to attached the photos.
Here is what I used:
- frames
- photos
- measuring tape
- marker
- masking tape
- duct tape
- fishing wire
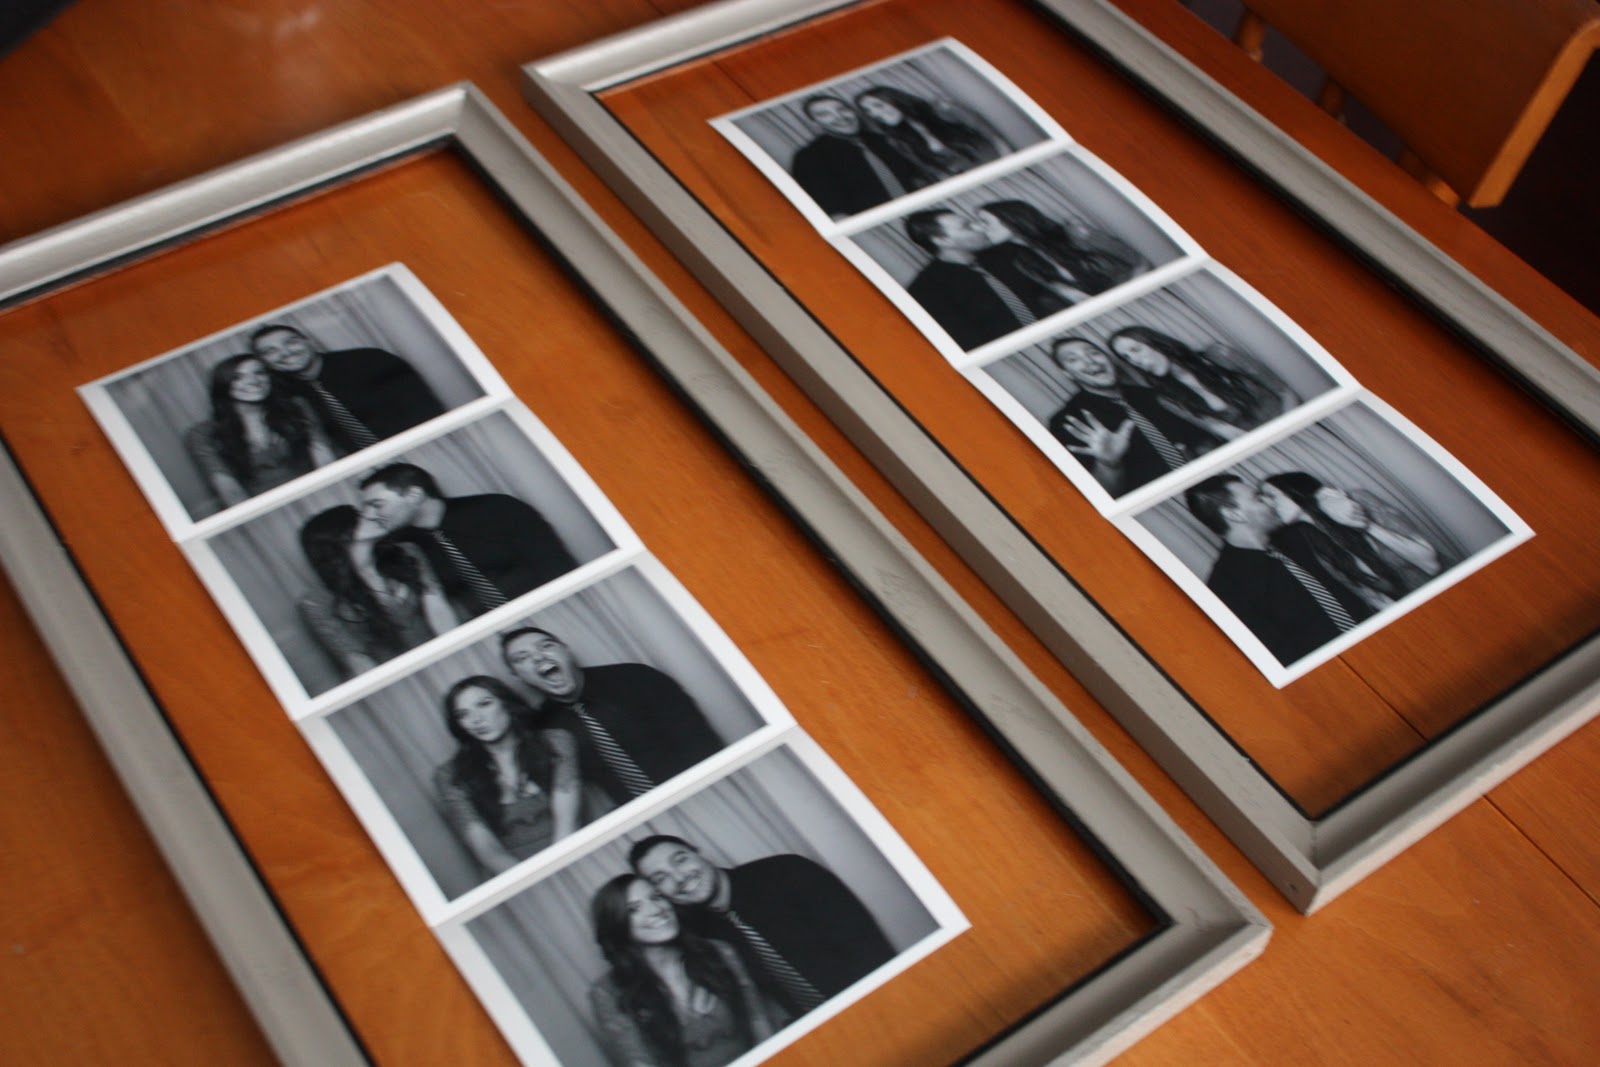
I lucked out that the company that did the photo booth at the wedding offered all the pictures in high quality for download on their website. I simply downloaded the photos and burned them to a disc. (If you wanted to do the same photo booth effect, you could easily replicate this by setting up a curtain to emulate a photo booth a take pictures in front of.) Then I brought them to Walgreens to print, adding a white border to each photo for more of a photo booth effect.
I lined up my photos in the frames in the order I wanted them to get an idea of how things would look.
Using masking tape, I taped the back of the photos to form one long picture like a photo strip.
When the pictures are flipped back over, they lined up perfectly at the seams.
Next was attaching the photos to the frame, which was the trickiest part.
The frames were 11.50" wide, so I marked the middle of the frame on each end (5.75"). This is where the wire will be attached.
I then cut a piece of fishing wire about an inch or two longer than the the length of the frame. At the bottom end of the frame I lined the fishing wire with the mark and secured it with a piece of duct tape. I repeated this on the top end of the frame, pulling the wire tight as I taped it down with the duct tape (hence the extra inch or two for leverage).
Once the wire was securely in place, it looked like this.
(EDIT: After hanging the pictures for 24 hours I noticed that the weight of the photos caused the fishing wire to start to droop a little and slip out of the top piece of duct tape. In order to make sure it was attached tightly, I added a dot of hot glue and replaced the duct tape. Another option would be to use two pieces of the fishing wire on the outer edges of the photos to evenly distribute the weight. If my hot glue trick doesn't work then I will be switching to this one.)
Next I marked a few dots along the center of the photo strip where the wire would be run.
I also marked the center of the piece of wire so that I could line it up with the center of the strip (also where the two middle photos attached.)
Once my marks were in place I could line the pictures up with the wire and the marks and put a few guider pieces of masking tape along the wire to hold it in place.
Once the wire and markers were lined up, I put one long piece of masking tape down the length of the photos to secure the pictures to the fishing wire.
Here is how it looked from the front. You can see the wire in this picture in the sunlight, but that wouldn't be the case once the picture was mounted on the wall.
I decided to hang the frames on either side of the big dining room windows.
As of now we usually only use the dining room when we entertain and have parties, so I figured it would be a nice piece to showcase when we had friends over. Plus the whole black, white and gray color scheme seemed to fit with the walls and trim in the dining room.
Next up for the dining room will be swapping out the antique honey colored wood furniture for a darker more modern set. And finding a great bright rug to add a pop of color.
As you can see, the string barely shows against the wall.
There you have it. How I made my floating frames, using easy supplies that I already had at home (fishing wire, duct tape and masking tape). Like I mentioned above, if this method doesn't seem to work over time I will look into alternate ways to frame the photos. Another option could be sandwiched between two pieces of plexiglass. Let me know if any of you give it a try and what method you used.